I am extremely mindful of my clients’ desire to have the very best products on their skin, therefore I am very particular about the products that I use. For me, creating a flawless and unique individual look is a must, and I find that Bellapierre mineral makeup is perfect in assisting the beautification without harming the skin. I believe that the way a person looks can essentially alter the way they feel and how they portray themselves.
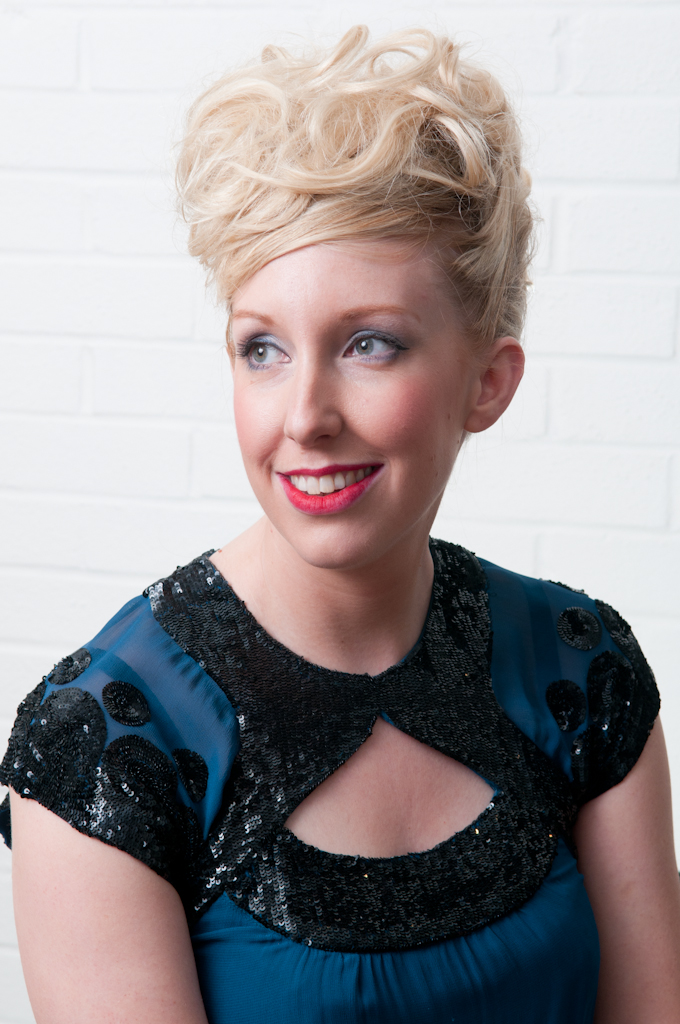
In this blog post I’m going to give you all the tips and tricks for how to get that perfect burlesque look for Christmas! I took my inspiration from Christina Aguilera’s take on the classic 1940s look.
Let’s start by preparing your skin. I’ve used Bellapierre’s milky cleanser to cleanse the face and neck. Then use the toner, moisturize, and apply primer. This will give a clean and smooth base for the makeup.
Apply Compact Mineral 5-in-1 Foundation with a Kabuki brush by dabbing the brush into the compact and then applying in a circular motion over the face.
One of the best things about mineral foundation is its versatility; Bellapierre’s foundation has 5 uses in one product, including concealer. Using a concealer brush conceals any problem areas.
Apply your favorite mineral blush colour (I used Autumn Glow, a luscious coral colour) to the apple of your cheek and blend. To get that gorgeous glow, highlight the cheek slightly by using Pure Element Bronzer.
For the eyes I’ve used earthy tones, such as Bellapierre’s Shimmer Powder in Champagne, Earth and a tiny amount of Bronze.
Using the lightest colour first, apply over the eyelids as a base, which will make the darker colours really pop. For a vintage look without being too vampy, blend and contour the sockets with the darker shades of brown.
Apply a liquid eyeliner to the upper lash line ending in a cat-like flick at the outer corners.
Using an eyebrow brush and a dark powder (Bellapierre’s Eyebrow Kit is fantastic for this) apply the powder in soft strokes along your natural eyebrow. Dark brows are a must-have for this look.
Finally apply Bellapierre Ruby lipstick to complete your very own burlesque Christmas makeover!
And there you go, a gorgeous look just in time for the Christmas party season!
I can be contacted on Twitter @simonecampsmua simc_mua@london.com or you can find me on Facebook!

My name is Natalie Shirlaw, I've been hairdressing for around 20 years and have worked in some of London’s top salons. I'm currently working as a session hairstylist, which means I specialise in TV, film, grooming for premieres, photoshoots etc. I'm currently the “face” of Yogi hair products and I do the hair show on QVC for them too. I've just been booked for the Sony premiere “The Girl with the Dragon Tatoo” in December too so I'm very excited about that! My website is www.shirlawstyle.com if you would like to read more about me.
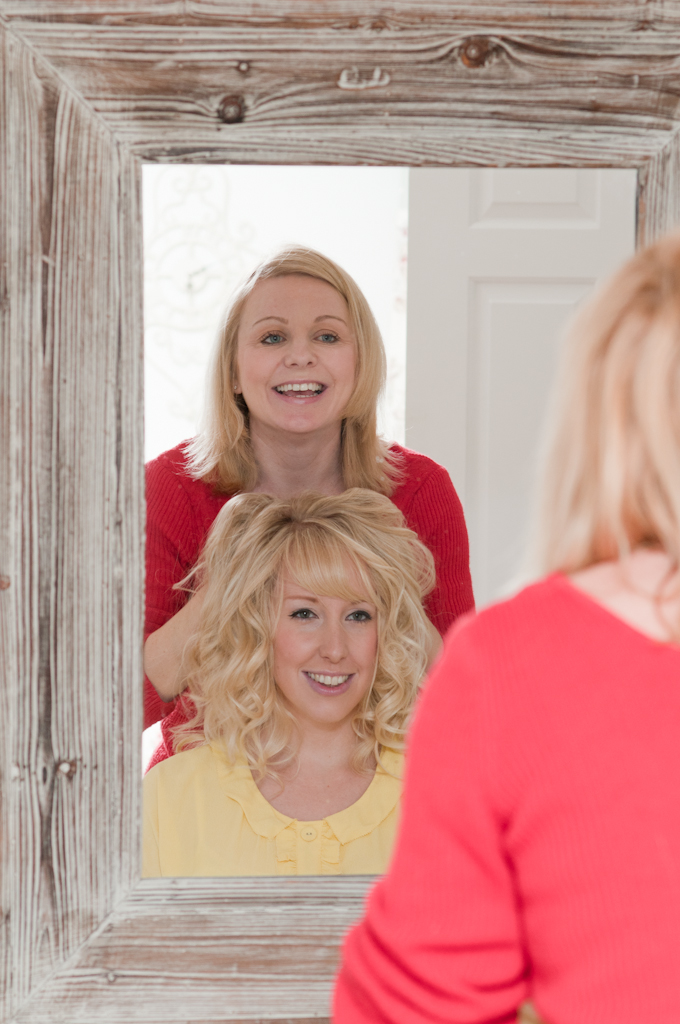
Im really excited to bring some Christmas party looks for you through Playful Promises. I hope you enjoy them and find my step by step easy to achieve! I have enlisted the help of my client Sinead who is modelling for me; we met when I did her gorgeous vintage themed wedding in the summer in Whitstable and also my friend and fantastic photographer Samantha Jones who does beautiful wedding pictures – take a look at her website!
Check out our first tutorial here!
LOOK 2: Nightclub

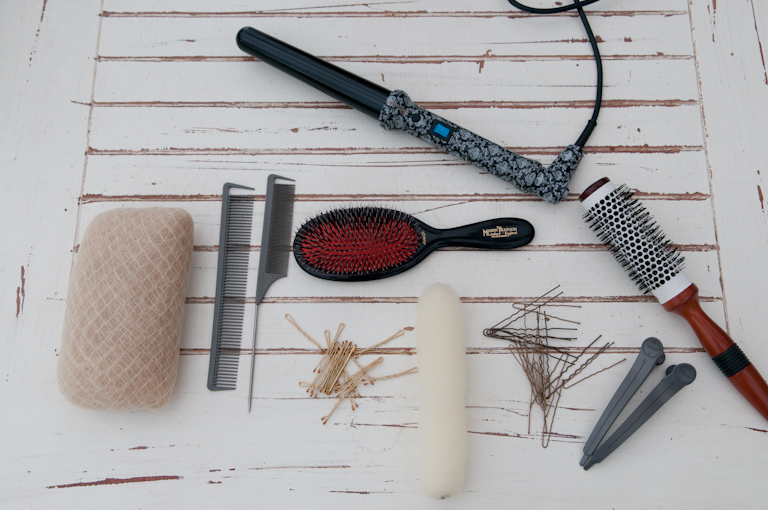
WHAT YOU NEED
Yogi Hair Wand
A bristle brush
Pincomb
Widetooth comb
Grips
Wide grips
Step 1
I've done this look for you so you can be a bit different from your friends! I've been looking at girls on the tube etc and everyone is now able to do the side buns and ponytails that are in fashion, so I thought I’d give you something more adventurous to try! And again it’s a lot easier than it looks!
Again the first thing any hairdresser will tell you if you want to put hair up you need lots of texture in your hair, as it's much easier to mould into shapes. Sometimes it's easier if you try this on the 2nd day after washing as your hair will have some natural texture in it.
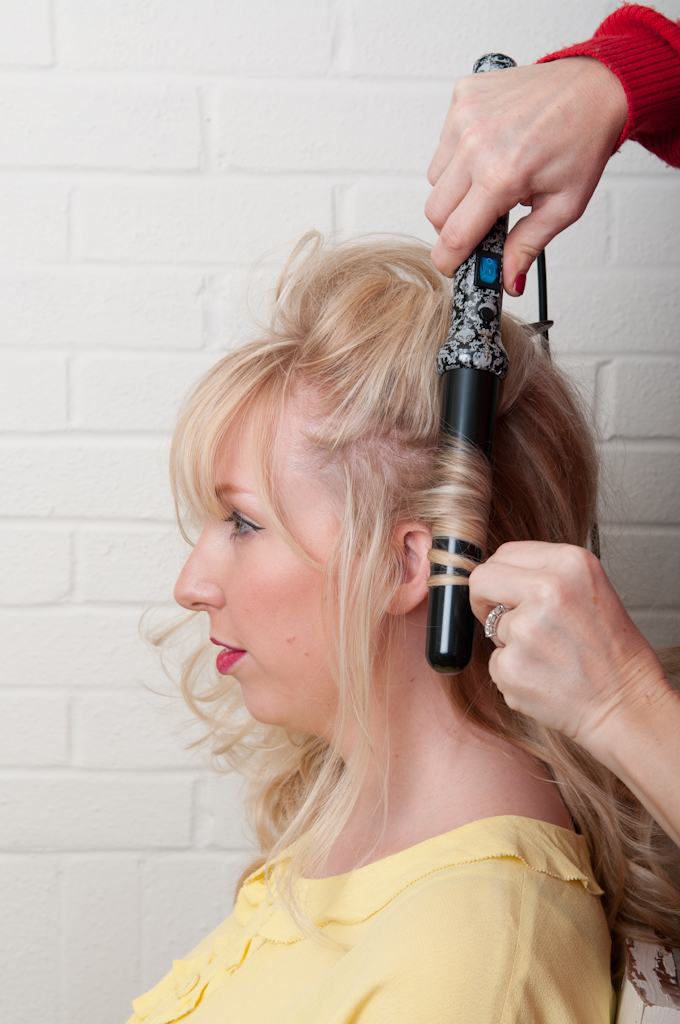
I used my Yogi fat barrel wand to create more lovely texture.
Step 2
Back comb the whole head by taking sections around the head and using that stroking backcomb method previous described here. You will be looking a bit scary when you’re done!
Step 3
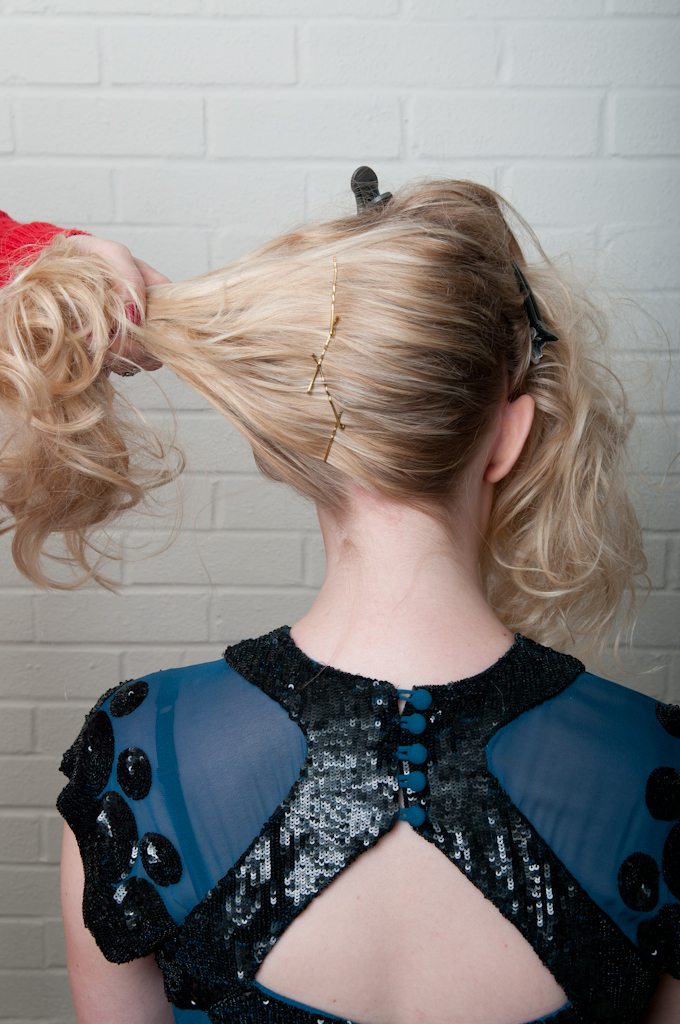
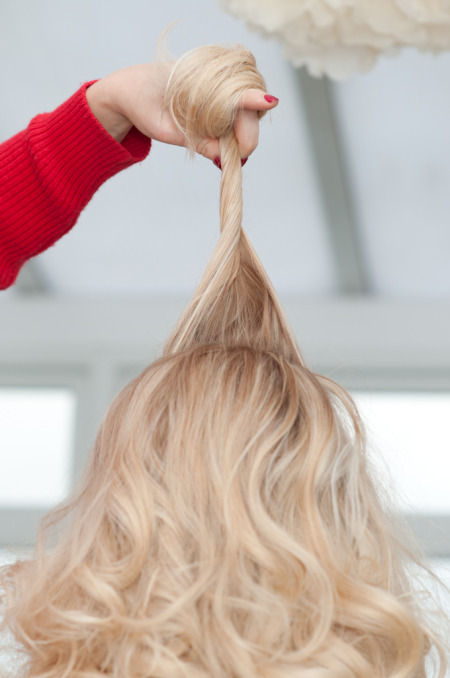
Take a section from ear to ear so you have your hair in 2 sections, 1 in the front and 1 in the back. Brush the back section over to one side and pin as shown. Then fold the rest of the hair back into itself to create a cone shape and pin to the head with the wider hair pins. If this is too difficult you can just clip it with a long butterfly clip.

Step 4
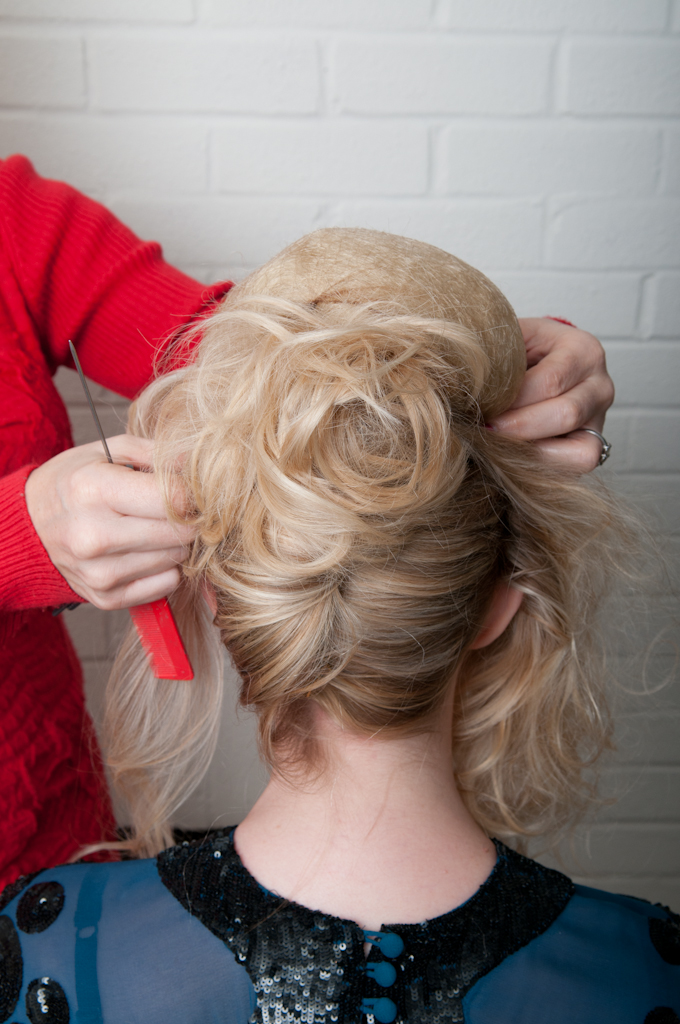
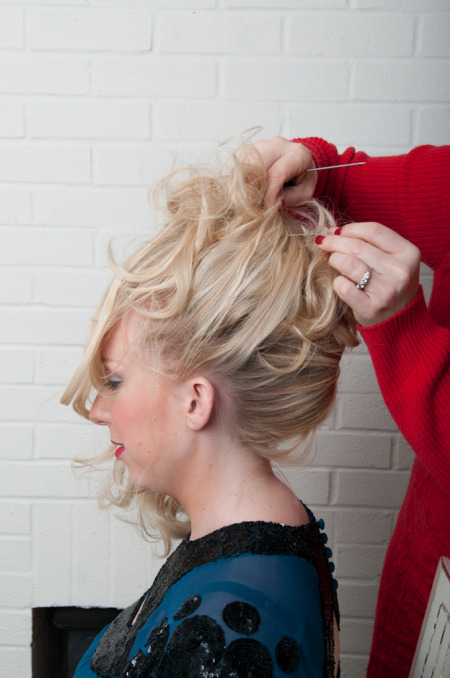
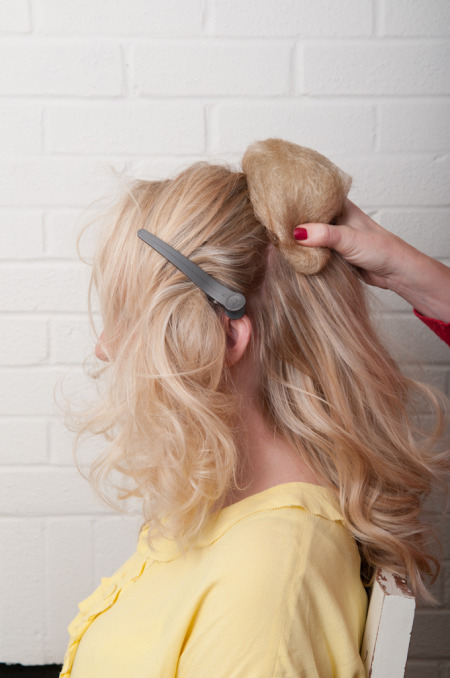
Place the padding on the top of the head and secure with grips. Then take random sections and pin everything upward onto the padding. When you have something to pad your hair with it makes pinning so much easier as it gives it something to grip onto. Twist bits of hair round and pin until you get this lovely shape!
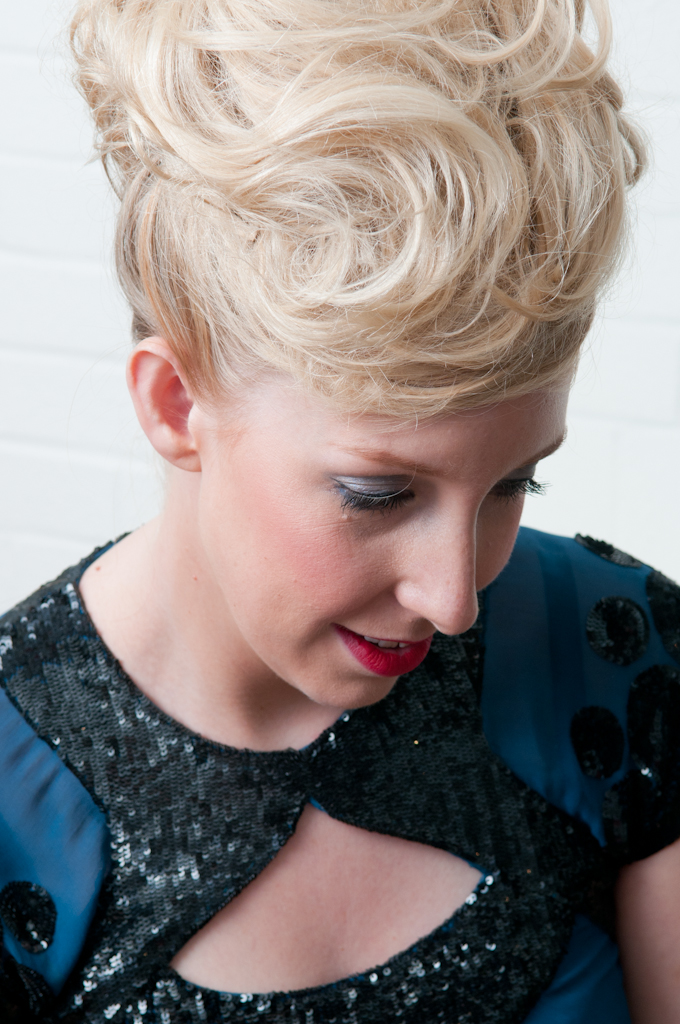
Good luck with styling and I hope you all look uber glam for your Christmas parties!
My name is Natalie Shirlaw, I've been hairdressing for around 20 years and have worked in some of London’s top salons. I'm currently working as a session hairstylist, which means I specialise in TV, film, grooming for premieres, photoshoots etc. I'm currently the “face” of Yogi hair products and I do the hair show on QVC for them too. I've just been booked for the Sony premiere “The Girl with the Dragon Tatoo” in December too so I'm very excited about that! My website is www.shirlawstyle.com if you would like to read more about me.
Im really excited to bring some Christmas party looks for you through Playful Promises. I hope you enjoy them and find my step by step easy to achieve! I have enlisted the help of my client Sinead who is modelling for me; we met when I did her gorgeous vintage themed wedding in the summer in Whitstable and also my friend and fantastic photographer Samantha Jones who does beautiful wedding pictures – take a look at her website!
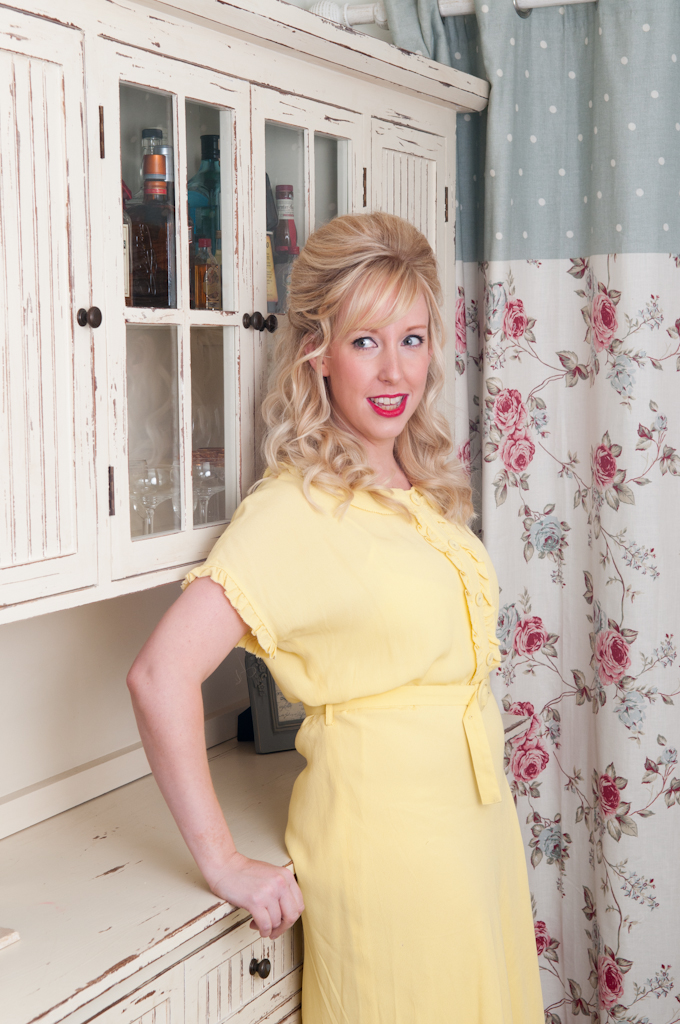
LOOK 1: Barbarella
WHAT YOU NEED
Yogi Hair Wand
A bristle brush
Pincomb
Widetooth comb
Grips
Wide grips
PRODUCTS
I use products from a company called Gentle Beauty as I prefer natural and plant derived products. They have their suncoat range and also a range by John Masters Organics which smells beautiful and is very effective as its made by a hairdresser

This look is so popular and very easy to achieve when you know how!
Step 1
The first thing you must do when you want big hair is get texture in it, backcombing alone isn’t good enough you first have to create a texture in the hair. To get great texture when you first wash your hair you must use some styling products. I used John Masters sea mist. Rough dry the hair, maybe even upside down to get plenty of body and movement. You can even do this a day or 2 after washing if you find your hair has better texture when it is a bit dirty.
Step 2
Next I have used my Yogi hair wand; the great thing about this wand is it's very easy to use and you don’t need any additional products to make a curl. I used the large barrel wand on Sinead’s hair. You can already see the lovely texture in her hair.
Step 3
Backcomb the hair with the widetooth comb. You don’t have to backcomb with a pincomb as this can make the hair very knotted to get out. The trick is in the way you backcomb. Hold the section of hair and take long sweeping movements from 2 inches away from the root back down towards the root slowly and carefully (rather than sawing movements at the root!!!!) If you do this correctly the hair will stand up alone. Spray with some hairspray. I like Sun coat spray as it is non aerosol or the aveda ones are good too!
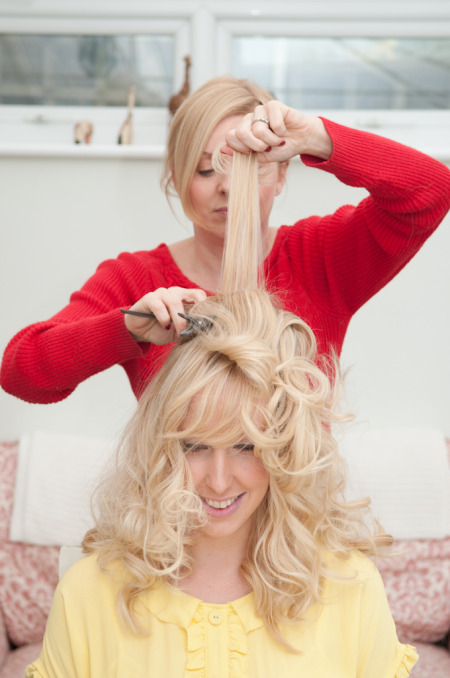
Step 4
Section off the hair as shown then place the padding in at the crown and secure with grips. Take your bristle brush and smooth the hair gently over the padding and pin behind. Keep the hair a liitle tousled as it will look too old fashioned if its too neat and Voila!!!

Keep your eyes peeled next week for my second Christmas party look! If you use this tutorial we would LOVE to see photos of the results - make sure you post them in a comment!